Editing Guide
Well welcome to my Guide, here you will learn a few things about Editing (and maybe style, color etc). You will learn the basics first of course :3 and the rules of Copyright. Well I hope you learn form this Guide and have fun.
Beginning with the simple answers, how? why? when? huh? to edit you will always see an Edit button on the right of every page below you username, next to the Read Button. On some pages you might see View Source, it means that page is protected and you can't edit it because you do not have the rights.
When you edit you also have to find a page to edit and before you just start editing check the search bar which is at the right of the edting section below the Log out link. You want to make a page and you also want to be sure that your are not already making a duplicate of a page that already exists to you type the page name. eg:
Also remember to keep in mind if you are editing and page that is for example a quest type "quest" or "(Quest)" to check if there is a version like that if there is is no version of like them both continue with "(Quest)" if you're still not sure check the game, Aqworlds or the Original Wiki. Then when you continue on this you will see the page link in red color but if you have seen it will be a bit light like this:
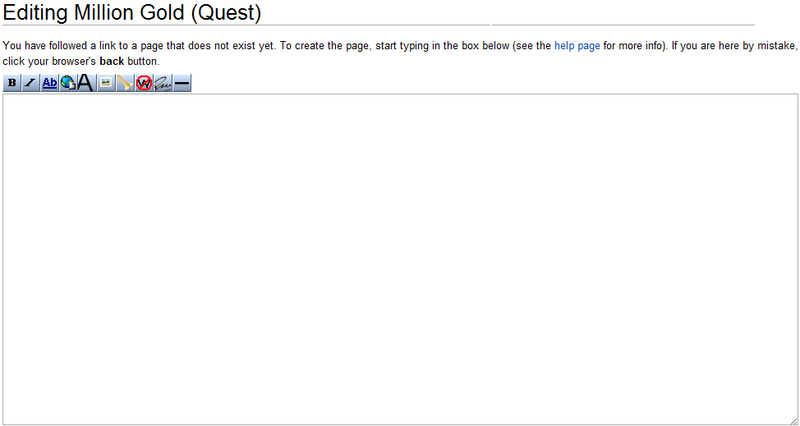
Then click it and it will take you to the editing page:
When you get on that page you need to make the quest you can type the description by seeing the game's description on the quest. Still, how will you edit? You need to use "Templates", you can find a list of useful Templates here and to see how to use the Template for the Quest click here. Now as you are done filling up the spaces and blanks look at this:
First it tells you about "Copyright", after that "Summary" you have to fill up the summary with what you did, changed and made on this page. Then "Watch List" if you check that you will be E-mailed that the page has changed you might use it to know if someone changed a page you like. In the Last are the 3 buttons and another "Editing Guide". You might want to see what you changed so press the "Show Changes" Button, you might want to check your edits and find mistakes press the "Show preview" button and you have to save the page so press the "Save Page" button.
The boarders? the normal boarders are not rounded they are square shaped. To get rounded borders type {{Rounded}} in the boarder code. Type </div> at the end of the boarder code to make the boarder end. You can even set the roundness of the boarder, to do that you will have to add an coding for example: {{Rounded|3em}}. You can add any number instead of "3" of course!
Normal Boarders
<div style="width:90%; border: 2px solid grey; background:white; padding:20px">
Rounded Boarders
<div style="width:90%; border: 2px solid grey; background:white; padding:20px; {{rounded}}">
You might have noticed this by now:

As soon as you upload a file you will have to link it to a page and add design, so to add an image to a page you will have to copy the name of the file with "File:/Image:" and ".png/.jpg/.jpeg etc." example:
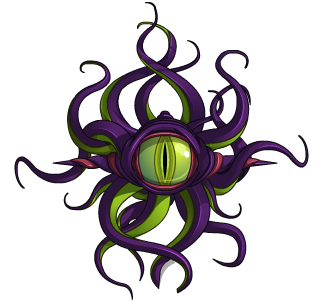
[[File:The eye of Chaos.png]]
I can put special coding in the image in a image like this:
[[File:The eye of Chaos.png|thumb]]
I can add many codings like: |center, |right, |left, |thumb you should try all of them out.
You are gonna give you text a style? Let's begin with the simple tools the Bold tool when you are editing you see a fat "B" Click that and automatically where you blinking line is this will come "Bold text" the text inside the 6 ''' will become fat as shown now. The Italic tool you saw the button next the the bold button a I that looks like a falling building when you click it you will see this "Italic text" the text inside the 4 '' will tilt as shown now. You can center the text like this:
<center>Centered Text</center>
You can turn it to the left or right just by changing "center" to another alignment like right or left. You can change it's size like this:
<font size=3>Big Size</font>
Big Size
You can even change the font of the text by searching the Internet like this:
<font face="Blackchancery">Blackchancery</font>
Blackchancery
Well Hi again, this time I am telling you about the text colors to add colors to text first you must add
<nowiki><font color="TypeYourTextHere">
before the text and then
"</font>"
after the text to end the coloring, for example you will type this:
<font color="purple">Purple Color</font>
Then you will get this:
Purple Color
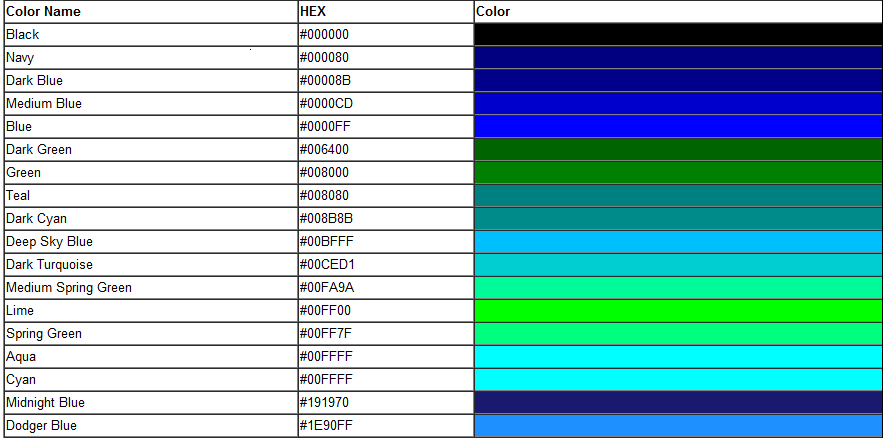
Everyone colored when they were kids :D so lets talk about colors. Colors make you page attractive and nice to view and I am talking about Double Rainbows all the way :3 anyways..... here is a list of a few colors below. You may enter the hex code or type the name of any color.
That's About it, Credits to Seelkadooom and Original Color Format by Isa
The following is basic information on where to find General resources such as templates:
Templates
This is a Guide that shows the various Templates for making Pages.
Help for Uploading a Image
This is a Guide which helps you how to upload an image to the Wiki.
Extra Help
This is a Guide which helps you with anything that is not mentioned in this Guide.
Clearing Your Cache
This is a Guide which helps you to Clear Your Cache.
List of Guides
This is a list of Guides which can help you with other things.Image Maps
Image Maps is a Advanced Editing Skill, it is not necessary to know for editing on AQWorlds Wiki.
But it is a great addition to know for the future!
Image Maps have been used on AQWorlds Wiki for example:
Book of Lore.
How to make a Image Map
Step 1) Make your Image including all the text.
Step 2) Upload the Image to the AQWorlds Wiki and use the link of the Image on this site Image-Maps.com (This Site Map's the Areas you want in it).
Step 3) After the Mapping is Complete Click the html Code.
Step 4) You will see Co-Ordinates (Copy them and put them some where like a Note Pad).
Step 5) Use this Code:
<imagemap>Image:your image name here.jpg|800px|
rect 25 285 133 317 [[link to destination here]]
rect 27 325 135 357 [[link to destination here]]
rect 28 357 136 389 [[link to destination here]]
rect 15 240 150 276 [[link to destination here]]
rect 36 158 125 236 [[link to destination here]]
desc bottom-left </imagemap>
Step 6) Replace All the Numbers with the Co-Ordinates from Image-Maps.com
For Example Line one says:
rect 25 285 133 317 [[link to destination here]]
the website says line one should have: 33,247,142,381
As a Result Line one should be:
rect 33 247 142 381 [[link to destination here]]
Step 7) Replace the [[link to destination here]] to the desired link.
Notes
- The rect stands for rectangle, that is the shape of the area which will be click-able for the link.
- You can also use pent (five points of location) & circle (which uses radius).
